

Centerline and Centermark in AutoCAD are relatively new features added in the 2017 version.
With the help of these tools, it’s now fairly easy to add a center mark to an arc or a circle, you can also add a center line with ease using the center line tool.
In this article, I will explain how you can leverage the benefits of these AutoCAD tools to the best possible extent, let’s start with Center Mark tool.
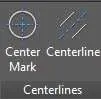
Center Mark
To add a center mark to a circle or arc select this tool from Centerlines panel of Annotate tab.
The cursor will change into a Pickbox, click on the circle or arc and press enter to exit the command.
You will notice that a default center mark will be added as shown in the image below.
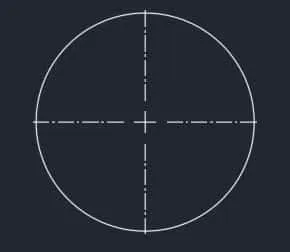
By default, the center mark will span the complete diameter of the circle and it will remain so even when you change the radius of the circle.
When the radius of this circle is changed using grips or using properties palette the center mark will adjust it's size to the new dimensions of the circle.
You can modify the properties of this center mark using properties palette.
Double click on the center mark to bring the quick properties palette, in the bottom of quick properties palette you will find an option for hiding the extension line.
Select No from the show extension option to hide the extension line from center mark.
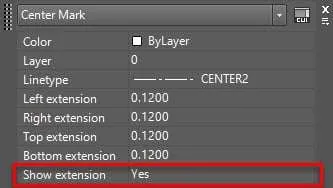
The default centerline extends beyond the circle circumference.
You can change the size of this extended length from the quick properties palette or manually using grips of center mark.
Centerline
As the name suggests this tool will add a centerline in between two parallel or non-parallel lines.
70 lessons| Easy Level
If you are absolute beginner of AutoCAD then you can get started right from scratch using this free course.
To add a centerline select the Centerline tool from Centerlines panel of Annotate tab and click on the two lines.
The centerline will be automatically added in between the selected lines.
If the lines are intersecting then the centerline will pass through the angle bisector of the lines as shown in the image below.
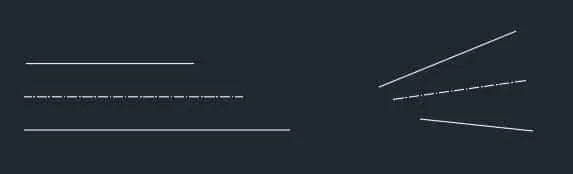
In this case also the center line will remain attached to their lines and changing the position or angle of lines will change the centerlines as well.
Changing properties of center lines
The properties of these centerlines and center mark such as linetype, linetype scale and linewidth can be changed using system variables as mentioned in this Autodesk knowledge network page.
Alternatively, you can also use CHPROP command.
As an example, I will change the linetype scale and linewidth for the current center line.
Type CHPROP on the command line and press enter, then select the center line and press enter again.
You will see that the command line now shows lots of options related to the center line.

Select Lweight from the command line and type 1 and press enter.
Select ltScale from command line again and change it's value to 1.5, this will increase the linetype spacing to 1.5 times of the initial value.
Press enter twice to accept the values and exit the command.
You will see that the new properties will be applied to the center line.
You may need to activate the lineweight option from the status bar to see it in drawing area.
Summary
So that was the center line and center mark feature of AutoCAD.
Now that you have these features you don't need to make custom linetypes for this and AutoCAD has made adding them a lot easier as well with just a few clicks.
If you have questions or comments share it with us down below.


do you have access to the center line on the free trial of autocad
Hi Davian,
Yes, You will have the access for central line and center mark in the latest version of AutoCAD, with its free trial too.
is centreline not available in autocad 2013 version?
Hi Ajay
They’re absolutely right central line and center mark is not available in auto versions of AutoCAD. I would request you to please update with the latest version so that utilize this particular feature in it.