
AutoCAD has the drawing comparison tool that is used to identify the difference between two different DWGs, most preferably DWGs with the same design, only with a revision or an added feature.
This feature highlights the differences between the two drawing files using specified colors (mostly green and red) and makes spotting the difference between them fast.
How to use the compare tool in AutoCAD
The compare tool is found under the collaborate tab, under the compare panel, as shown in the exhibit below.
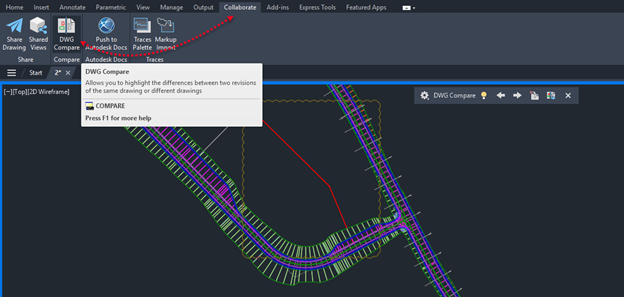
To get the most out of this feature, first have an open drawing of your choice that you will use as a base reference.
AutoCAD automatically picks your open drawing as the underlay drawing and prompts you to pick another drawing to compare it against.

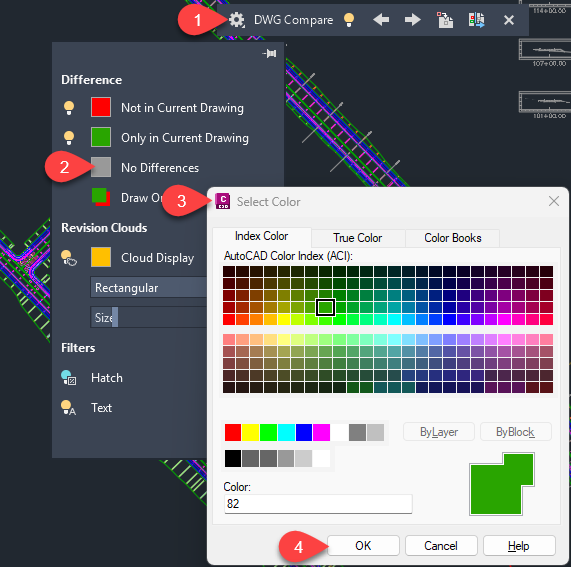
In the DWG Compare window, a gear icon will be visible within the center-upper area of your workspace, as shown above.
Under it you can change some comparison settings, like the colour coding of the comparison elements.
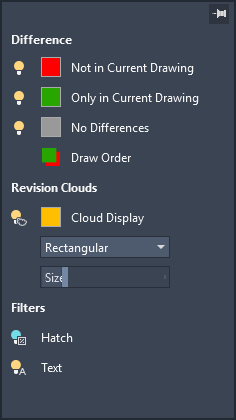
As shown in the exhibit above, the color green highlights DWG items that are only available in the current underlying drawing, the color red highlights if it is missing in the current underlying drawing, and grey if there is no difference between the two drawings (but you can change the draw order).
From the bulb icon adjacent to the color code discussed above, you can either choose to hide the three main categories of the drawing from the drawing by either toggling it off (a blue-colored bulb) or on (a yellow-colored bulb); this applies to other components under the compare settings.
Moreover, if you prefer using different colors apart from red and green to represent the DWG differences, you can click on the color icon to get the Select Color window, from which you can select any color of your preference.
The other available option under the gear icon is the revision cloud, which makes the drawing review experience easier and faster within the software environment.
Or, if exported as a PDF or other relevant format, you can also change the colour, shape and size of the revision cloud with respect to the type of design you are working on.
Another neat feature is that you can adjust if the hatches and/or text comparison will be done between the different DWG making the comparison less busy in the event of annotation changes or hatch pattern changes; this can be toggled on or off under the filter area in the DWG Compare settings.
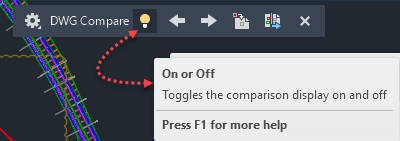
Furthermore, in the main comparison bar settings, you can opt to hide all comparisons done in the view by toggling the bulb on or off as shown in the exhibit below.
AutoCAD allows you to move through multiple compared items that have a difference; you can either move forward or backwards using the direction icons in the main comparison bar setting.
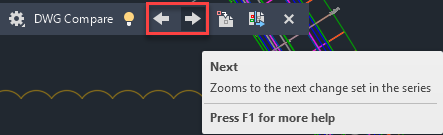
This feature is quite helpful, as it also facilitates zooming in at that particular section so that there is a difference between the two drawings.
Another helpful feature found in the main comparison bar setting is the ability to import blocks or objects from the compared drawing, reducing design time and misplacement errors, especially for coordinate-sensitive designs.
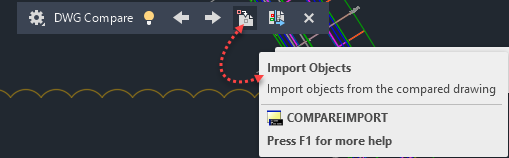
Once the option is activated, you are prompted to select the objects that you want to bring into the model; this allows for control of your design work, facilitating the importation of only the approved points.
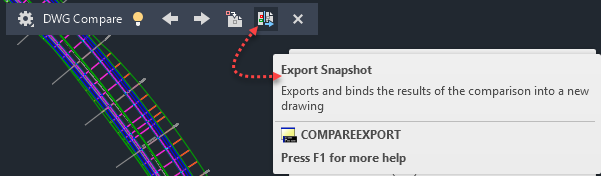
Finally, once satisfied with the comparison, you can now export the comparison view by binding it into a new drawing and sharing it with relevant teams in a .dwg or .dxf format.
This can be achieved in AutoCAD using the Export Snapshot option that is available in the main comparison bar setting, as shown in the exhibit below.
Benefits of using the Drawing Comparison tool in AutoCAD
The Drawing Comparison tool in AutoCAD increases design efficiency by eliminating manual comparison of drawing files, especially when the design is under continuous development.
This tool facilitates easier collaboration between multiple design teams, as different drawing files can be shared out and comparisons about the specific changes can be observed and adopted into new designs.
Frequently Asked Questions
Does AutoCAD LT have the Drawing Compare tool?
Yes, AutoCAD LT has a drawing comparison feature tool integrated into it.
You can use it to compare two versions of a drawing file and visualize the highlighted differences in real time and apply all the features discussed above.
In fact, the drawing comparison feature tool is available for other software like Civil 3D, Plant 3D, etc., that have the AutoCAD engine built in.
Can I use the Drawing Compare tool for 3D objects in AutoCAD?
Yes, the drawing comparison feature tool can be used to compare 3D objects in AutoCAD but with some limitations, like it can only work within the model space area, it excludes point cloud data, and there are 2D wireframe view style representation differences.
Other items excluded from the 3D comparison include, but are not limited to, cameras, GIS and OLE objects, Nested blocks, non-DWG underlays, etc.
Can I compare more than two drawings in AutoCAD?
No, AutoCAD cannot compare a third drawing.
AutoCAD only facilitates the comparison of two drawings at a time with the natives’ features discussed above.
Furthermore, if you need more features, third-party plugins can be used to get more advanced features.
Conclusion
AutoCAD has many features that make it the go-tosoftware for most CAD design engineers, and one of them is the Drawing Comparison tool.
This is an essential tool that facilitates seamless collaboration between teams.
It allows fast checks and interventions when working on the same drawing but different disciplines, and the best thing about it is that anyone can use it; it is not rocket science; it involves just a few clicks as discussed above.
Let me know if you have ever needed to use this tool in your design work or if it is a nonessential tool that is found in AutoCAD.